There are various situations that might necessitate the migration of your services from one server to another, including security compliance, end-of-life considerations, increased load, and more. In this article, we will delve into the process of migrating WDS and MDT to a new Windows Server.
Changes in security and compliance requirements within your organization may compel you to migrate WDS or MDT to a new server. This transition can involve modifications in deployment architecture, implementation of additional security measures, and the transfer of WDS roles to a different server due to hardware updates. Including WDS migration in your disaster recovery plans is crucial. Additionally, many companies opt to centralize their IT infrastructure to enhance management, efficiency, and security.
To migrate WDS and MDT from Windows Server 2016/2019 to Windows Server 2022, you can follow the steps outlined below.
Let’s explore these steps in more detail.
It’s essential to have Windows Deployment Services (WDS) installed on both the source and target machines, especially since you are migrating from an older system. Typically, the service is already running on the original machine, so we need to proceed to install Windows Deployment Service on the target machine. You can follow the steps outlined below to accomplish this.
Once you finish the installation, you’re ready to move forward.
Before starting the deployment, it’s necessary to disable the Windows Deployment Service Server on the source machine. To do this, open the Services application on the source machine, locate Windows Deployment Service Server, right-click on it, and choose Stop.
Additionally, it’s important to ensure that both setups, the source and the target, are aligned. To verify this, navigate to the Deployment Share(s). You can access this by going to Computer Management > System Tools > Shared Folder > Shares, where you’ll find the name of the Deployment Share folder, which we will need to recreate.
Begin by locating the folder, right-clicking on it, and selecting Properties. Next, navigate to Sharing > Advanced Sharing > Permissions and make a note of all the permissions. It’s essential to document these permissions as you will need to configure the new folder similarly.
Next, we need to install the Windows ADK and MDT on the target machine. You can visit learn.microsoft.com to install the ADK (make sure to download both the ADK setup and the ADK preinstallation environment setup) and go to microsoft.com to install the Microsoft Deployment Toolkit.
Now, on the target server’s File Explorer, you’ll need to access the shared location, copy the Deployment folder, and paste it onto the local drives of the target machine. The time required for this action will depend on the size of the folder.
After completing the above steps, continue by following the subsequent instructions.
Now that we have set up the Deployment folder, it’s time to initiate the deployment process.
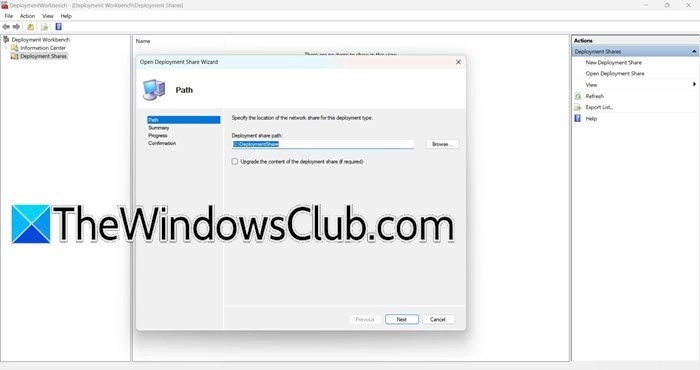
As a reminder, please ensure that you have installed the Microsoft Deployment Toolkit and the Windows ADK(s). If that’s all set, launch the Microsoft Deployment Toolkit on the target machine to commence deployment. Follow the outlined steps below to proceed.
After completing those steps, it’s important to verify that everything is functioning correctly.
Although the Deployment Share has been imported, we copied it from an older server. Therefore, right-click on the deployment share, select Properties, and update the Network (UNC) Path. Next, navigate to Rules > Edit Bootstrap .ini and modify the DeployRoot field. Finally, select Apply > Ok to save the changes.
Once you have set up a deployment share, the next task is to ensure it is updated. Adhere to the steps outlined below to complete this process.
This should take care of everything, but there is one additional step required to finalize the setup.
After updating the deployment share, we will move forward with establishing the WDS Directory. Follow the instructions provided below to accomplish this.
When you have finished, you can then test and install the image.
That’s it!
To migrate a WDS server, the first step is to install the WDS feature on your system. Ensure that you stop the WDS Service on both the old and new servers. Next, access the OldServer share and copy all the necessary files to the NewServer share. Once the files have been copied, restart the WDS service.
Read: How to install and configure File Server on Windows Server?
Windows Deployment Services (WDS) and Microsoft Deployment Toolkit (MDT) are both essential tools for deploying Windows operating systems. WDS is primarily designed for network-based deployment, while MDT offers capabilities for customization and automation. By leveraging both of these tools together, you can establish a robust deployment solution.
Also Read: Windows deployment services encountered an error 0xc0000023.
Published on October 22, 2024
Tags: Server
October 11, 2024
September 21, 2024
October 16, 2024
October 7, 2024
Hudson Valley Host is premier provider of cutting-edge hosting solutions, specializing in delivering a seamless online experience for businesses and individuals. We offer a comprehensive range of hosting services, including Shared Hosting, VPS, Dedicated Servers, and Colocation. With 24/7 technical support, robust security measures, and user-friendly control panels, we empower clients in managing their online presence effortlessly. Hudson Valley Host is your trusted partner in achieving online success.
For Inquiries or to receive a personalized quote, please reach out to us through our contact form here or email us at sales@hudsonvalleyhost.com.