Domain Name System Security Extensions (DNSSEC) is a vital series of extensions designed to enhance the security of the DNS protocol. By employing cryptographic signatures, DNSSEC validates DNS responses, safeguarding against threats like DNS spoofing and cache tampering. In this guide, we will delve into the steps required to configure DNSSEC on a Windows Server, along with DNS Socket Pool and DNS Cache Locking for improved security.
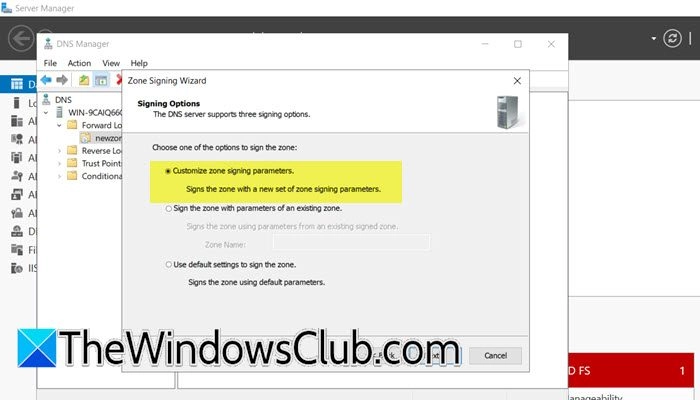
To initiate DNSSEC configuration, follow these steps:
After this, verify by navigating to Trust Point > ae > domain name in DNS Manager.
Once the zone is configured, use the Group Policy Management utility to implement necessary domain policy alterations:
Enhancing DNS security further, the DNS Socket Pool should be configured to randomize source ports for outgoing queries. To adjust the socket pool size, run PowerShell as an administrator and execute:
Get-DNSServeror
Get-DnsServerSetting -All | Select-Object -Property SocketPoolSizeTo increase the socket pool size, use:
dnscmd /config /socketpoolsize 5000Note: The value must be between 0 and 10,000. After this, restart your DNS Server.
To protect cached DNS records from being overwritten during their TTL, DNS Cache Locking needs to be configured. Check the current locking percentage using:
Get-DnsServerCache | Select-Object -Property LockingPercentIf it’s not at 100%, set it by running:
Set-DnsServerCache –LockingPercent 100By applying these configurations, your DNS security on Windows Server will be significantly enhanced.
Hudson Valley Host is premier provider of cutting-edge hosting solutions, specializing in delivering a seamless online experience for businesses and individuals. We offer a comprehensive range of hosting services, including Shared Hosting, VPS, Dedicated Servers, and Colocation. With 24/7 technical support, robust security measures, and user-friendly control panels, we empower clients in managing their online presence effortlessly. Hudson Valley Host is your trusted partner in achieving online success.
For Inquiries or to receive a personalized quote, please reach out to us through our contact form here or email us at sales@hudsonvalleyhost.com.