When you use Windows Server, it becomes normal to use Windows Remote Assistance. However, if you haven’t used it earlier, you can follow this guide to enable, disable, set up, and use Remote Assistance in Windows Server 2022.
To enable or install Remote Assistance in Windows Server 2022, follow these steps:
To know more about these steps, continue reading.
First, you need to open the Server Manager and select Manage > Add Roles and Features option.
Then, choose the Role-based or feature-based installation option from the Installation Type tab and go to the Server Selection tab to select a server from the pool.
Once done, you need to switch to the Server Roles tab and click the Next button without selecting anything. Following that, tick the Remote Assistance checkbox in the Features tab and go to the Confirmation tab.
Finally, click the Install button to start the installation process.
To set up and use Remote Assistance in Windows Server 2022, follow these steps:
To know more about these instructions, keep reading.
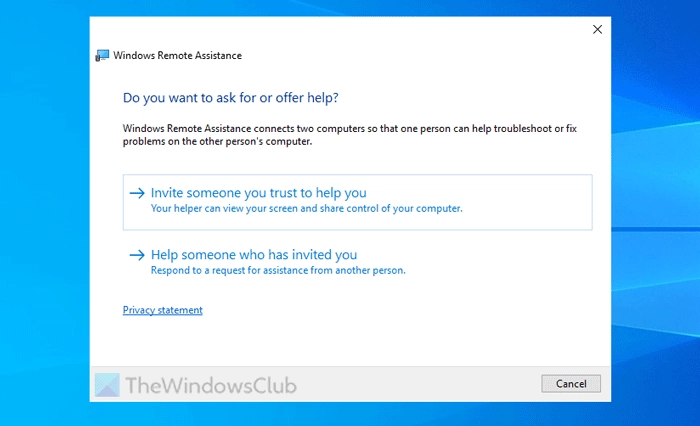
To get started, you need to create an invitation file through the Windows Remote Assistance utility. For that, you need to search for remote assistance in the Taskbar search box and click on the individual search result.
Then, choose the Invite someone you trust to help you option.
After that, it asks you to invite someone. You have three options:
After selecting an option, the person needs to open the file through the Windows Remote Assistance application only.
Once done, your computers will be connected remotely. Following that, the connected person can help you or vice versa.
To disable or remove Remote Assistance from Windows Server 2022, follow these steps:
To Get More Info about these steps, keep reading.
First, you need to open the Server Manager and select Manage > Remove Roles and Features.
Click the Next button and select the server from the server pool. Do not select anything in the Server Roles tab and click the Next button.
In the Features tab, select only Remote Assistance by clearing the checkbox.
Then, click the Next and Remove buttons accordingly.
That’s all! I hope these guides helped you.
Related: Disable, Enable, Set up & use Windows Remote Assistance in Windows 11
To enable Remote Access in Windows Server 2022, you need to open the Add Roles and Features Wizard panel. Then, go to the Server Roles section. From here, choose the Remote Access checkbox and click Next. Following that, choose what feature you want to install and click the Next button in the Role Services tab. Finally, click the Install button.
To enable RSAT on Windows Server 2022, you need to open the Server Manager > Manage > Add Roles and Features Wizard. Then, go to the Features tab and select the Remote Server Administration Tools checkbox. Click the Next button and go through the installation process.
Read: Windows could not start the Remote Desktop Services.
Published on August 5, 2024
Tags: Server
July 25, 2024
July 18, 2024
August 2, 2024
August 1, 2024
Hudson Valley Host is premier provider of cutting-edge hosting solutions, specializing in delivering a seamless online experience for businesses and individuals. We offer a comprehensive range of hosting services, including Shared Hosting, VPS, Dedicated Servers, and Colocation. With 24/7 technical support, robust security measures, and user-friendly control panels, we empower clients in managing their online presence effortlessly. Hudson Valley Host is your trusted partner in achieving online success.
For Inquiries or to receive a personalized quote, please reach out to us through our contact form here or email us at sales@hudsonvalleyhost.com.