
This tutorial will be guiding through the installation procedure of CampaignChain. Campaign chain is an open source campaign management and marketing integration solution. With campaign chain, marketers can plan, execute, monitor and optimize campaigns in a holistic overview. In addition, developers can integrate communication tools, channels and devices with this open source platform. This tutorial will be guiding you through the simple installation of Campaign chain on a VPS server loaded with Ubuntu 16.04. This tutorial will not be explaining the configuration of Campaigns which you need to do yourself after installing the campaign chain on the server.
This tutorial includes the following steps
As per the Campaign chain website, the minimum requirement to install and run campaign chain are listed below. We may need additional setup required during installation which will be explained in this tutorial wherever required
I request you to go through our LAMP stack installation guide to do a basic configuration of the server. Please follow the below steps to satisfy the above-mentioned minimum requirement by your server. Skip the steps, if you have already these modules configured on your server.
sudo apt-get install php (Installs PHP on your server) sudo apt-get install php-json php-curl php-pdo php-gd php-intl (Installs PHP JSON, Curl, PDO, GD and INTL modules) sudo apt-get install mysql-server (Installs MySQL server)
The following lines of code will add the java pack into the repository and install it on the server.
sudo add-apt-repository -y ppa:webupd8team/java sudo apt-get update sudo apt-get -y install oracle-java8-installer
To verify the java installation, just run the following command which will list the version of java running on the server.
java -version
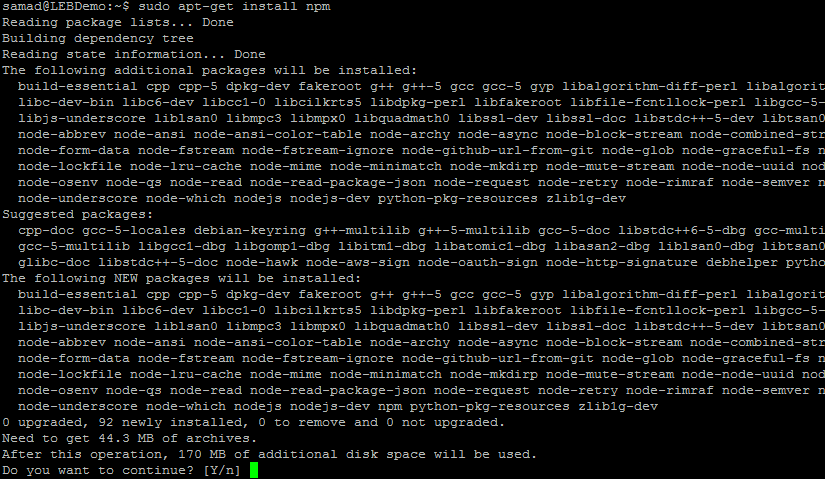
Campaign chain makes use of Bower for Javascript components. We need to install npm which comes up with nodejs before installing the bower on the server. As npm is come up with nodejs, we will follow the below steps to install node.js, npm and bower. Just release the following command to install node.js on the server
sudo apt-get install nodejs
Subsequently, put the following command to install npm on the server
sudo apt-get install npm
 The following command will be used to install bower on the server
sudo npm install -g bower
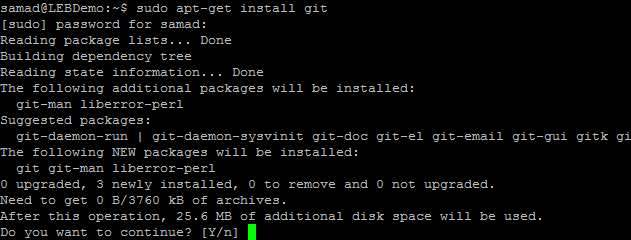
 Additionally, please install git on the server if you haven’t done it earlier on your server. Just use the following command to install git on server
sudo apt-get install git
 Please use the following command to link nodejs with node. If the node directory is not available, campaign chain will throw an exception during installation.
sudo ln -s /usr/bin/nodejs /usr/bin/node
Campaign Chain makes use of MySQL as the database for storing data. As the database details are required to run the campaign chain installation, we need to create a database for campaign chain before we start installing. Just apply the following command into the putty box to log into MySQL server. Please provide MySQL root password when it asks for the password
mysql -u root -p
Use the following command to create a new database. Replace the “ccdatabase” with any name that you wish to use for campaign chain database
CREATE DATABASE ccdatabase;
In the next step, we will create a database user. To create a database user, run the following command. Please don’t forget to replace “ccuser” with the database user name of your wish and “StrongPassword@1” with a strong password of your choice.
CREATE USER ‘ccuser’@’localhost’ IDENTIFIED BY ‘StrongPassword@1’;
The following command will gran full access to the created database for the user created in the above step. As usual, Please replace the database name and user name with one created above.
GRANT ALL ON ccdatabase.* TO ‘ccuser’@’localhost’;
Release the following command to flush the privileges table
FLUSH PRIVILEGES;
The below command will take you out of database command prompt
exit;
Campaign chain makes use of Composer for managing the packages and modules. Please use the following command to install the composer on your server globally.
sudo curl -sS https://getcomposer.org/installer | sudo php — –install-dir=/usr/local/bin –filename=composer

In this step, we will install the base system on the server. Before the installation begins, I will create a separate directory for campaign chain on my server to make use. I’m going to fetch the campaignchain files into a directory named “campaignchain”. I will create a directory for campaign chain on my server as like below
cd /var/www/ mkdir campaignchain
Please note that you can create a directory in any path and can use any name. Now navigate to new directory before proceeding to next step
cd campaignchain
Now you are ready to install the campaign chain base system on the server. Just use the following command to install the base system.
composer create-project –stability=dev campaignchain/campaignchain campaignchain dev-master
You can replace the bolded campaignchain with any name you wish. The usage of above command will create a new directory named campaignchain inside our already created directory campaignchain. That is the files will be now available in the path /var/www/campaignchain/campaignchain
During the installation, it will ask you to input some parameters such as database details. The very important parameters include database name, database user, database password, router.request_context.host. Please don’t leave these parameters unfilled as the installation will fail or you will face some issues with automated background process The router.request_context.host is the domain name. Here I have used my server IP as hostname whereas you can use your domain name. 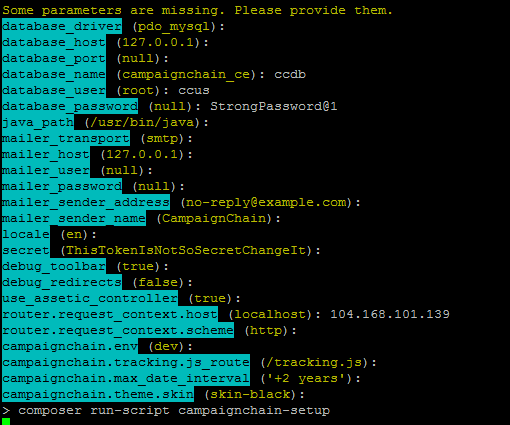
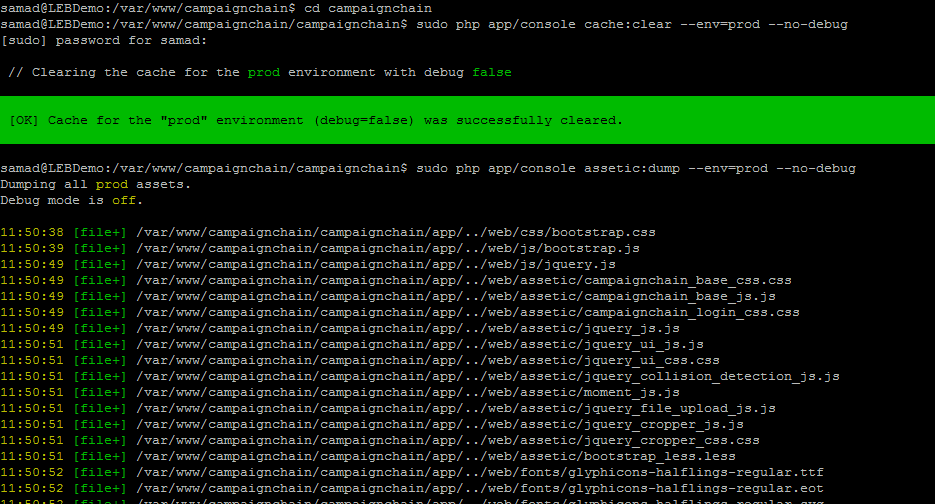
Once the installation complete, navigate to the inner campaign chain directory by using the following command. Please note, your directory name may be different.
cd campaignchain
Now use the following commands one by one. The first command will clear the cache and the second one will the dump assets
sudo php app/console cache:clear –env=prod –no-debug sudo php app/console assetic:dump –env=prod –no-debug
Please make sure that the following directories are writable.
You can use the following command to check the permission value of a file or folder. It should have proper permission by default. If not, please use chmod to change permission.
stat –format ‘%a’ app (replace app with the folder or file name)
We need to set up a cron job to work the scheduler. Just follow the below steps to edit crontab and add new cron job
crontab -e -u samad
Replace samad with your username It will open the editor. Please add the following line to the file opened. Please replace /var/www/campaignchain/campaignchain with the path to your campaign chain installation folder
*/1 * * * * cd /var/www/campaignchain/campaignchain && php app/console campaignchain:scheduler –env=prod 1>/dev/null 2>/dev/null
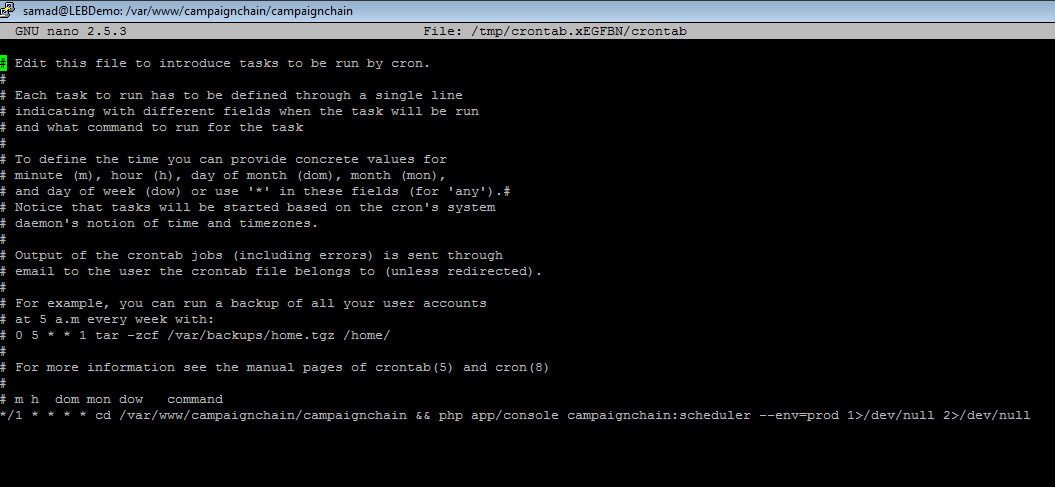 Now Press Ctrl+O to save and hit enter when it asks for the file name confirmation. Then Ctrl+X to exit the editor
We will use PHP’s built-in web server to run the campaign chain. To start the web server, just use the following command. Please replace the IP address with your server IP or domain name
sudo php app/console server:start 104.168.101.139

The final step in the campaign chain installation is web based. In the web-based installation, we will be mainly configuring the admin account details and bit.ly API key To run the web-based campaignchain installation, just load the following URL in a browser. Please don’t forget to replace the IP address with your domain name or IP address.
http://104.168.101.139:8000/
The installation windows will be loaded on the browser. There will be a possible error message that will be thrown by the installation if you haven’t edited the php.ini file to set timezone. 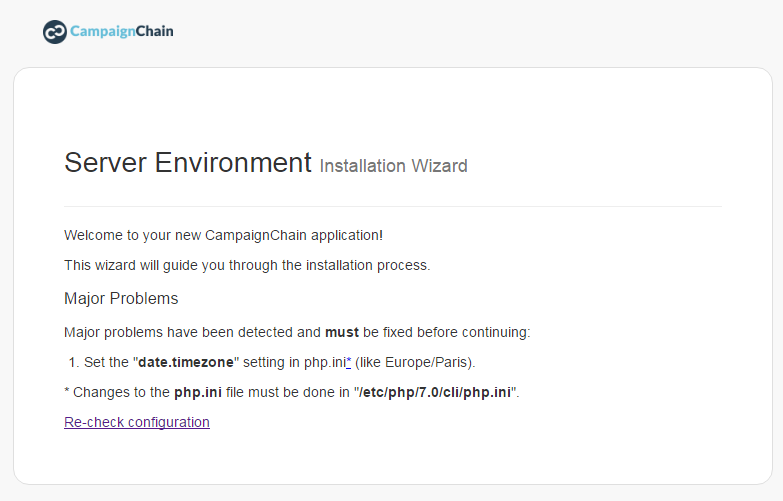 If you get the error, edit the php.ini file to set timezone using the following command
sudo vi /etc/php/7.0/cli/php.ini
search for date.timezone by using /date.timezone and replace the entire line with date.timezone = Asia/Kolkata You can change Asia/Kolkata with any other timezone. Save the configuration and restart apache using the following command
sudo systemctl restart apache2
Reload the installation page and if you see the error message again after the modification, restart the PHP server using the following command. As usual, change the IP address with your IP address
sudo php app/console server:stop 104.168.101.139 sudo php app/console server:start 104.168.101.139
Reload the page again to restart the installation Click on Next Step button
 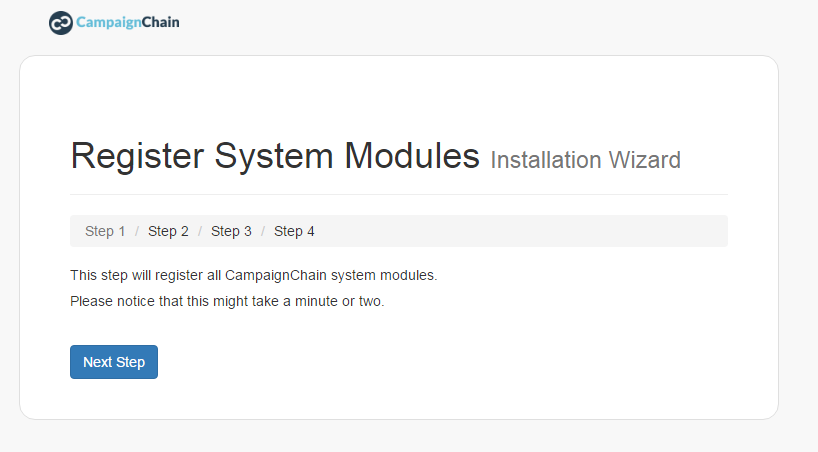 Simply click on the “Next Step” button to install system modules and proceed to the next step
 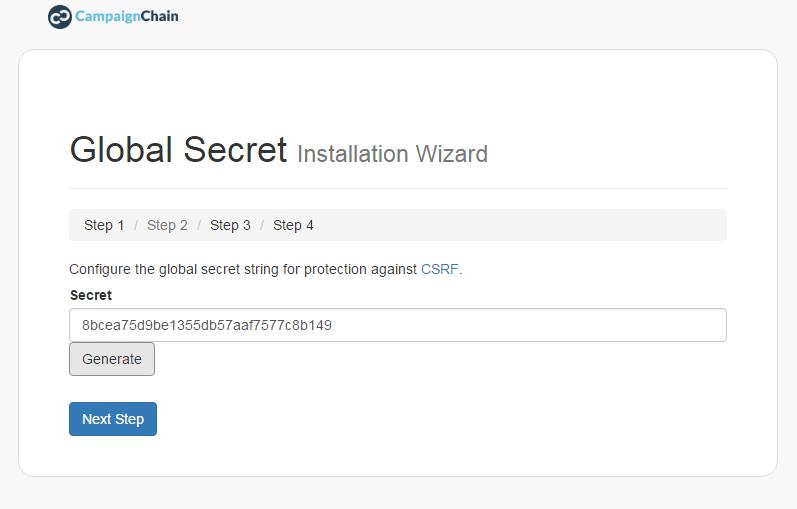 In this step, Global secret key will be generated
  In this step, you need to input bit.ly access token. Just open https://bitly.com/a/oauth_apps to create an access token
 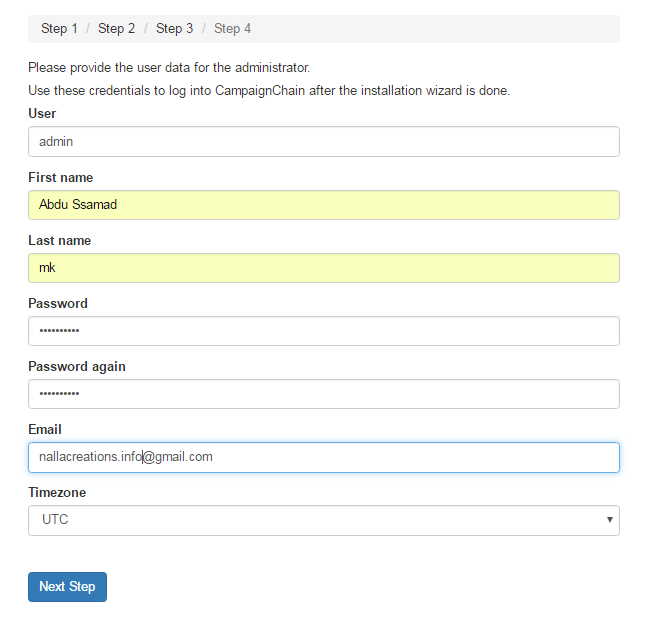 In the final step, configure the admin details for the login. Once you finish this step, the installation will take you into the login screen Login to the admin panel using the credentials used in the final step of configuration You will be taken to the campaign chain dashboard after successfully logged in to the system
 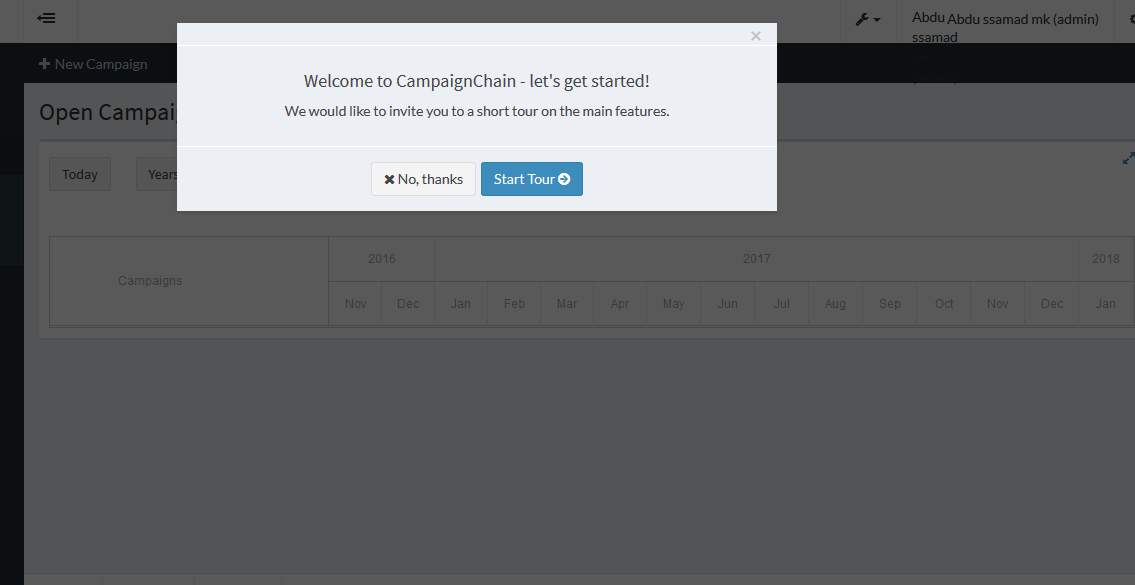 Hope this tutorial helped you to install campaign chain on your server. Share your experience of installing campaign chain