If you want to install DHCP server in Windows Server, here is how you can do that. You can install and uninstall the DHCP server using Server Manager and PowerShell.
A DHCP or Dynamic Host Configuration Protocol server allows you to configure a network of computers within an organization by automatically assigning IP addresses to the clients’ computers. Once set up, the process requires no further manual intervention.
To install the DHCP server in Windows Server, follow these steps:
Open the Server Manager and click on Manage > Add Roles and Features.
Then, choose the Role-based or feature-based installation option and click the Next button.
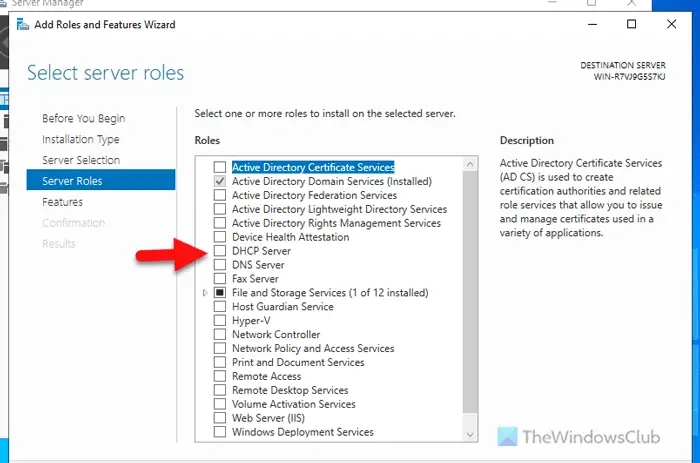
Next, choose the desired server from the server pool. If you have only one server, simply click the Next button.
Following that, tick the DHCP Server checkbox and click the Next and Add Features buttons.
Finally, click the Install button to start the installation process. Once done, you can close all the windows.
To install a DHCP server on Windows Server using PowerShell, here is what you need to do:
Continue reading to find out the detailed steps.
Begin by launching PowerShell with administrative privileges. To do this, type powershell into the search box on the taskbar, then right-click on the PowerShell icon, choose ‘Run as Administrator’, and confirm by clicking ‘Yes’.
After opening it, type the following command:
Let it be finished. Once done, you can close the PowerShell window.
To uninstall DHCP server from Windows Server, follow these steps:
Open the Server Manager on your computer and click on Manage > Remove Roles and Features.
Then, choose the server from the server pool and click on the Next button. Following that, remove the tick from the DHCP Server checkbox.
Once completed, a window will appear displaying all DHCP tools present on your server. Expand this list to view all tools. Then, press the Remove Features button.
This action will take you to the Features tab. Here, you simply need to click the Next button.
Next, press the Remove button in the confirmation window.
After completing these steps, close all windows and restart your server. You may also select the Restart the destination server automatically if required checkbox before hitting the Remove button, which serves the same purpose.
Read: Disable or Enable DHCP for Ethernet or Wi-Fi in Windows
To deploy the DHCP server, navigate through the Server Manager by selecting the Role-based or feature-based installation method. Then select your desired server from the server pool. Continue by marking the DHCP Server option and choosing the additional features to be installed. Click the Install button to proceed. Alternatively, launch PowerShell as an administrator and use the following command: Install-WindowsFeature DHCP -IncludeManagementTools.
Enabling DHCP on Windows Server via CMD is not viable. Instead, utilize PowerShell by locating it via the Taskbar search, right-clicking to select Run as Administrator, and affirming your choice. Implement this command: Install-WindowsFeature DHCP -IncludeManagementTools. The installation process will require a short duration to finish.
Read: Fix Unable to contact your DHCP Server error on Windows.
Published on September 7, 2024 Tags: Server
July 25, 2024
July 18, 2024
September 5, 2024
September 4, 2024
Hudson Valley Host is premier provider of cutting-edge hosting solutions, specializing in delivering a seamless online experience for businesses and individuals. We offer a comprehensive range of hosting services, including Shared Hosting, VPS, Dedicated Servers, and Colocation. With 24/7 technical support, robust security measures, and user-friendly control panels, we empower clients in managing their online presence effortlessly. Hudson Valley Host is your trusted partner in achieving online success.
For Inquiries or to receive a personalized quote, please reach out to us through our contact form here or email us at sales@hudsonvalleyhost.com.